Payment components: user guide
MultiSafepay's Payment Component
Our payment components lets you seamlessly embed your payment methods in your checkout.
Single vs. Multiple payment components
You can include one or multiple payment methods:
-
Single payment components: Renders one specific payment method in your checkout using the
init(payment)property. This solution requires theGATEWAYto be included in the component. -
Multiple payment components: Renders all available payment methods in a list using the
init(dropin)method. The solution does not require you to provide theGATEWAYparameter. Our SDK automatically fetches the available payment methods retrieved from the payload and displays them in your checkout.Check our Github repository where you can find more examples for Multiple payment components:
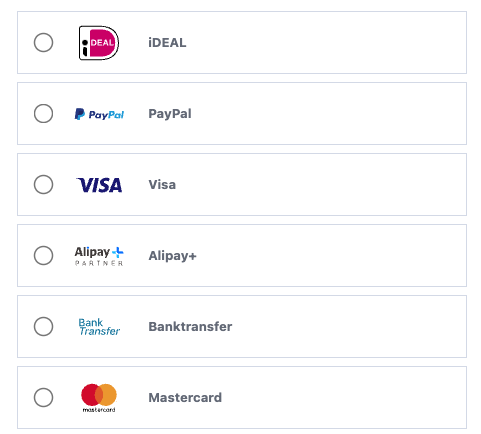
Check the samples below to see a preview:
User guide
TEST vs LIVE environment
Test your payment component before going live. Our step-by-step guide provides the necessary TEST tools to validate your integration and confirm that payments are processed correctly.
Once testing is complete, switch to the LIVE environment to start processing real transactions.
1. Add the HTML elements
Add the following elements to your checkout page:
- Add the component's CSS to the
<head>of your checkout page:
<link rel="stylesheet" href="https://testpay.multisafepay.com/sdk/components/v2/components.css">- Add the component's script to the bottom of the
<body>of your checkout page:
<script src="https://testpay.multisafepay.com/sdk/components/v2/components.js"></script>- Add the DOM element for the component's UI in the
<body>of your checkout page:
<div id="MultiSafepayPayment"></div>2. Initialize the component
a. Generate an API token
Payment Components require a MultiSafepay API token. See API reference – Generate an API token.
b. Construct the component object
- Initialize an
orderDataobject, containing information about the customer's order collected during the checkout process:
const orderData = {
  currency: 'EUR',
  amount: 10000,
  customer: {
  	locale: 'de_De',
  	country: 'DE'
	}
};
Properties
| Key | Required | Value |
|---|---|---|
amount | Yes | The value of the order. Format: Number without decimal points, e.g. 100 euro is formatted as 10000 |
currency | Yes | The currency of the order. Format: ISO-4217 , e.g. EUR |
customer.country | No | The customer's country code. Checks the availability of the payment method. Format: ISO-3166-1 alpha-2 , e.g. NL |
customer.locale | No | The customer's language. Sets the language of the payment component UI. Format: ISO 639 language codes and ISO 3166 country codes. Supported languages: en_EN, es_ES, fr_FR, it_IT, nl_NL |
recurring.model | Yes, for recurring payments | The tokenization model. |
- Construct a
PaymentComponentobject in thetestenvironment using theorderobject and your API token:
const PaymentComponent = new MultiSafepay({
    env: 'test',
    order: orderData,
    apiToken: apiToken,
    recurring: recurringData //only for recurring payments
});
Recurring payments
Recurring payments let you store a customer’s payment details as a secure token. Upon subsequent payments, customers can select their stored payment details and pay with a single click.
Recurring payments must be enabled for your account before they can be used in Payment Components. For more information, see Activation – Recurring payments.
Initial recurring payment
To store payment details, include a customer reference and recurring model in orderData:
const orderData = {
  currency: 'EUR',
  amount: 10000,

  customer: {
    locale: 'en_EN',
    country: 'NL',
    reference: 'customer-456'
  },

  recurring: {
    model: 'cardOnFile'
  }
};
If the customer consents to storing their payment details, the component returns:
payment_data.tokenize = trueWhen creating the order from your backend, always include:
recurring_model: 'cardOnFile'How to retrieve saved tokens
Retrieve saved tokens from your backend:
async function getCustomerTokens() {
  const response = await fetch('/api/tokens', {
    method: 'GET'
  });

  return response.json();
}
The backend should call:
GET /v1/json/recurring/{customer_reference}?api_key={api_key}Display saved tokens
When building the recurring object, retrieve the tokens retrieved from the component:
const customerTokensResponse =
  await getCustomerTokens();

const savedTokens =
  customerTokensResponse.success &&
  Array.isArray(customerTokensResponse.data?.tokens)
    ? customerTokensResponse.data.tokens
    : [];

const recurringData = {
  model: 'cardOnFile',
  tokens: savedTokens
};
Initialize the component with recurring data:
const PaymentComponent = new MultiSafepay({
  env: 'test',
  order: orderData,
  apiToken: apiToken,
  recurring: recurringData
});
Example token object:
{
  token: 'fIKWadOQda',
  code: 'VISA',
  display: 'Card xxxx xxxx xxxx 1234',
  bin: 123445,
  name_holder: 'Holder',
  expiry_date: 3012,
  expired: 0,
  last4: 1234,
  model: 'cardOnFile'
}
Subsequent recurring payment
When a stored payment method is selected, create the order using the payment data returned by the component. The stored token value is used as the recurring identifier.
c. Initialize the component
-
Call the
PaymentComponent.init()method and include the requiredcontainerandgatewayparameters:PaymentComponent.init('payment', { container: '#MultiSafepayPayment', gateway: '<GATEWAY>' });Check the table below lo learn more about the components properties:
Property Type Description init('payment')Method The method that initializes the core payment module and boots the necessary library dependencies containerParameter Specifies the target DOM element where the component will be injected gatewayParameter Defines the payment method used for the transaction -
Replace the
<GATEWAY>placeholder with the relevant payment gateway identifier.Payment method Gateway ID Bank transfer BANKTRANSBancontact MISTERCASHCard payments CREDITCARDDirect debit DIRDEBiDEAL IDEALIn3 IN3PayPal PAYPALGoogle Pay GOOGLEPAYApple Pay APPLEPAY -
Define event handlers to respond to specific component actions:
Event Handler Description onEventOccurs when there is a state change in the component (e.g., a successful payment). onGetQROccurs when the QR is rendered in the payment component. onErrorOccurs when there is an error in the payment component. onLoadOccurs when the payment component UI is rendered. onSelectOccurs when the customer selects an issuer with iDEAL. onValidationOccurs when form validation changes. Can be used to disable the payment button until all fields are validated. Example
PaymentComponent.init('payment', {
   container: '#MultiSafepayPayment',
   gateway: '<GATEWAY>',
     onLoad: state => {
       console.log('onLoad', state);
     },
     onError: state => {
       console.log('onError', state);
     }
});
Wallet payment buttons
Wallet payment buttons (such as Google Pay and Apple Pay) are independent from the regular Pay button in your webshop. The following onEvent handler serves as a trigger that detects when a wallet payment has been successfully authorized, sends the payment data to your backend to create or update the order, and then continues the flow by initiating a redirection:
...
onEvent: function (state) {
  if (state) {
            try {
                if (state.type == 'payment' && state.success && state.data.paymentData) {
                    setOrder(PaymentComponent.getOrderData
                        ? PaymentComponent.getOrderData()
                        : PaymentComponent.getPaymentData()
                        ).then(response => {
                        if (response.success) {
                            PaymentComponent.init('redirection', {
                                order: response.data,
                                settings: redirectSettings.settings
                              });
                          }
                      });
                  }
              } catch (e) {
                  console.log(e);
              }
          }
},
...
The state of the wallet button can be controlled using setState. For example, you can disable the button until a condition is met, such as the customer accepting your Terms & Conditions. This allows you to establish prerequisites before the payment flow is started, even though the wallet button itself is managed by the SDK.
PaymentComponent.setState({
    payment_button: {
        enabled: 0 | 1
    }
})Methods
The PaymentComponent has the following methods:
| Method | Description |
|---|---|
getErrors | Returns error messages or codes. |
hasErrors | Returns a boolean value indicating whether errors were registered. |
getOrderData | Returns an object containing a payment_data object and the full order configuration. |
getPaymentData | Returns a payment_data object with a payload containing the customer's payment details, used to create orders, and the gateway. |
setQR() | Returns a boolean to set up the QR code. Requires argument orderData. If orderData is not sent, the payment will not be associated with the order. |
setState | Allows you to control the state of payment buttons rendered by the wallet, such as enabling or disabling them. |
getState | Returns the current state of the payment component or buttons. |
3. Create the order
Handle the interaction
- Assign the button element to a variable. When the customer clicks the button, call
getPaymentData()to retrieve the necessary encrypted payload to send to your server.
const paymentButton = document.querySelector('#payment-button');Payment data parameters:
| Key | Required | Description |
|---|---|---|
gateway | Yes | The unique gateway_id to redirect the customer to the specific payment method. |
payload | Yes | Information required to process the payment. ⚠️ Note: Do not edit or modify the payload or otherwise the payment fails. |
tokenize | Optional | For recurring payments. If a customer selects to either save their cardholder data for future visits or use an existing token, a payment_data.tokenize parameter is added. |
- Create an event handler for the payment button:
- When the customer clicks the payment button, call the component's
getPaymentData()method. - Send the response to your server and create an order.
- Return the response from your server to the client-side to redirect the customer.
4. Complete the order
Once the customer initiates the payment, your integration must handle two critical tasks: preventing duplicate transactions and managing the post-order redirection.
a. Handle the submission
To ensure a correct payment flow, disable your payment button upon clicking. This prevents order duplications in our system.
- If
response.successisfalse, re-enable the button so the customer can correct their details or try again. - If
response.successistrue, disable the button and proceed to the redirection handler.
b. Redirect the customer
By passing your server's response to init('redirection'), the component automatically determines the next step based on the payment method:
- Authentication: Automatically redirects to 3D Secure (Cards) or Issuer pages (iDEAL).
- Frictionless: Redirects directly to your defined
redirect_url(Success page). - Information Display: Renders Bank Transfer details or QR Codes directly within the component container if applicable.
Implementation example
paymentButton.addEventListener('click', e => {
      paymentButton.addAttribute('disabled');
      if (PaymentComponent.hasErrors()) {
          let errors = PaymentComponent.getErrors();
          console.log(errors);
          return false;
      }
      createOrder(PaymentComponent.getPaymentData()).then(response => {
          if(!response || !response.success) {
              paymentButton.disabled = false;
              console.log(response);
          } else {
              PaymentComponent.init('redirection', {
                  order: response.data
              });
          }
      });
  });
c. Create an order
Create an order from your server, appending the payment_data collected from the payment component UI to the order data.
See API reference – Create order > Payment component.
5. Go live
To test the payment methods, see Testing payment methods.
When you're ready to process real payments, make the following changes:
-
In Step 1: Add the elements, replace the test JavaScript library with the live JavaScript library:
<script src="https://pay.multisafepay.com/sdk/components/v2/components.js"></script>Next, replace the test CSS file with the live CSS file:
<link rel="stylesheet" href="https://pay.multisafepay.com/sdk/components/v2/components.css"> -
In Step 2: Construct the component object, change the environment from
testtolive:PaymentComponent = new MultiSafepay({ env: 'live', apiToken: apiToken, order: orderData }); -
In Step 3: Create an order, change the test endpoint to the live endpoint:
https://api.multisafepay.com/v1/json/orders
Support
Updated 21 days ago