Single payment method
Technical manual for integrating a payment component using a single payment method.
This technical manual is for integrating a payment component using a single payment method.
1. Add the HTML elements
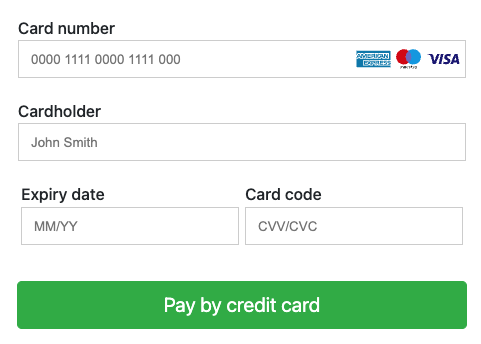
Add the following elements to your checkout page:
-
Add the component's CSS to the
<head>of your checkout page:<link rel="stylesheet" href="https://testpay.multisafepay.com/sdk/components/v2/components.css"> -
Add the component's script to the bottom of the
<body>of your checkout page:<script src="https://testpay.multisafepay.com/sdk/components/v2/components.js"></script> -
Add the DOM element for the component's UI in the
<body>of your checkout page:<div id="MultiSafepayPayment"></div>
2. Initialize the component
Generate an API token
Payment Components require a MultiSafepay API token. See API reference – Generate an API token.
💡 Tip! To keep your API key private, request the token from your own server.
Construct the component object
-
Initialize an
orderDataobject, containing information about the customer's order collected during the checkout process:const orderData = { currency: 'EUR', amount: 10000, customer: { locale: 'de_De', country: 'de' } };Properties
Key Required Value amountYes The value of the order.
Format: Number without decimal points, e.g. 100 euro is formatted as10000currencyYes The currency of the order.
Format: ISO-4217 , e.g.EURcustomer.countryNo The customer's country code. Checks the availability of the payment method.
Format: ISO-3166-1 alpha-2 , e.g.NLcustomer.localeNo The customer's language. Sets the language of the payment component UI.
Format: ISO 639 language codes and ISO 3166 country codes.
Supported languages:en_EN,es_ES,fr_FR,it_IT,nl_NLrecurring.modelYes, for recurring payments The tokenization model. How to process recurring payments
Recurring payments lets you store a customer’s payment details as a secure, encrypted token.
For subsequent payments, customers can select their stored payment details and pay with a single click.
To process recurring payments in your payment component:
- Add the
cardOnFilerecurring model - Make List tokens request from your server and provide a
tokens\
const orderData = { currency: 'EUR', amount: 10000, customer: { locale: 'en', country: 'NL' }, template : { settings: { embed_mode: true } } }; const recurringData = { "model": "cardOnFile", "tokens": [ { "token": "AvqeOjgdm8A", "code": "IDEAL", "display": "xxxxxxxxxNL81PSTB0000012345", "bin": null, "name_holder": "Schilder", "expiry_date": "", "expired": 0, "last4": null, "model": "cardOnFile" }, { "token": "BcEWsknWsYg", "code": "MASTERCARD", "display": "Card xxxx xxxx xxxx 4444", "bin": 555555, "name_holder": "Holder", "expiry_date": 2412, "expired": 0, "last4": 4444, "model": "cardOnFile" }]};SuccessYour payment component now automatically renders a checkbox where customers can choose whether they would like to store their cardholder data for future visits.
Recurring payments are supported for all card payments.
⚠️ Note: To test card details, see Test payment details – Credit and debit cards.
To use recurring payments in your payment component, you need to enable recurring payments for your account. If you haven't already, email [email protected]
- Add the
⚠️ Note: We use the orderData object to ensure the payment method is enabled, and the currency, country, and order amount are supported.
- Construct a
PaymentComponentobject in thetestenvironment using theorderobject and your API token:
const PaymentComponent = new MultiSafepay({
	order: orderData,
	recurring: recurringData
});
⚠️ Note: To use recurring payments in your payment components, initialize the component using the recurring object.
Initialize the component
-
Call the
PaymentComponent.init()method with the following arguments:PaymentComponent.init('payment', { container: '#MultiSafepayPayment', gateway: '<GATEWAY>', onLoad: state => { console.log('onLoad', state); }, onError: state => { console.log('onError', state); } }); -
Replace the
<GATEWAY>placeholder with the relevant payment gateway identifier.Gateway IDs
Payment method Gateway ID Bank transfer BANKTRANSBancontact MISTERCASHCard payments CREDITCARDDirect debit DIRDEBiDEAL IDEALIn3 IN3PayPal PAYPAL -
Create event handlers for the following events:
Events
Event Event handler onErrorCalled when an error occurs in the payment component. onLoadCalled when the payment component UI is rendered. onSelectOccurs when the customer selects an issuer with iDEAL. onSubmitOccurs when the customer clicks the payment button (when using the button generated by the component). onValidationOccurs when form validation changes. Can be used to disable the payment button until all fields are validated. ⚠️ Note: The
PaymentComponentuses the following methods:Methods
Method Description getErrorsReturns error details, e.g. error messages or codes hasErrorsReturns a boolean value depending on whether errors have been registered getPaymentDataReturns a payment_dataobject containing thegateway, and apayloadcontaining the customer's payment details, used to create orders.getOrderDataReturns an object containing a payment_dataobject and the full order configuration.
3. Create an order
Handle the interaction
-
Assign the button element to a variable:
PaymentComponent.getPaymentData()
The payment_data includes the following parameters:
  {
    "payment_data": {
    "gateway": "CREDITCARD",
    "payload": "xxxxxxxx",
    "tokenize": true
  }};
Parameters
| Key | Required | Description |
|---|---|---|
gateway | Yes | The unique gateway_id to redirect the customer to the specific payment method. |
payload | Yes | Information required to process the payment. Note: Do not edit or modify the payload or otherwise the payment fails. |
tokenize | Optional | For recurring payments. If a customer selects to either save their cardholder data for future visits or use an existing token, a payment_data.tokenize parameter is added. |
⚠️ Note: When payment_data.tokenize is set to trueyou need to append customer.reference to the order data.
- Create an event handler for the payment button to:
- When the customer clicks the payment button, call the component's
getPaymentData()method. - Send the response to your server and create an order.
- Return the response from your server to the client side to redirect the customer.
Redirect the customer
The component's redirection handler redirects the customer to the relevant page:
- If customer actions are required to complete payment (e.g. by completing 3D Secure or iDEAL issuer authentication), the customer is redirected to the relevant page. If successful, the customer is then redirected to the
redirect_url, i.e. the "success page". - If no customer action is required to complete payment, the customer is redirected to the
redirect_url, i.e. the "success page". - If the customer chooses to pay by bank transfer, the component displays the banking details needed for customers to complete payment.
- If a QR code is available for customers to complete payment on their mobile device, the component displays the QR code.
Avoid duplicate orders
When using your own payment button, if the customer clicks it again before they are redirected, this can create duplicate orders.
To avoid duplicate orders, disable the button until you have attempted to create an order.
Then, check response.success:
-
If
true, don't re-enable the button, and proceed to the redirect. -
If
false, re-enable the button for the customer to try again.paymentButton.addEventListener('click', e => { paymentButton.disabled = true; if (PaymentComponent.hasErrors()) { let errors = PaymentComponent.getErrors(); console.log(errors); return false; } createOrder(PaymentComponent.getOrderData()).then(response => { if(!response || !response.success) { paymentButton.disabled = false; console.log(response); } else { PaymentComponent.init('redirection', { order: response.data }); } }); });
Use the createOrder() function to pass the orderData to your server.
Create an order
Create an order from your server, appending the payment_data collected from the payment component UI to the order data.
Example
    {
    "type": "direct",
    "order_id": "test_order_id",
    "currency": "EUR",
    "amount": 100,
    "description": "Test Order Description",
    "payment_data":
        {
        "payload":"payment_component_method_response",
        "gateway": "CREDITCARD",
        }
    }
See API reference – Payment component.
Redirect the customer
-
From your server, pass the response to the payment component order request to the customer's device.
-
Check that
response.successistrue. -
Handle the response
Call the
PaymentComponent.init()method using the following arguments:PaymentComponent.init('redirection', { order: response.data });The component's
redirectionhandler redirects the customer to the relevant page:- If customer action is required to complete payment (e.g. by completing 3D Secure or iDEAL issuer authentication), the customer is redirected to the relevant page. If successful, the customer is then redirected to the
redirect_url, (i.e. the "success page"). - If no customer action is required to complete payment, the customer is redirected to the
redirect_url, (i.e. the "success page"). - If the customer chooses to pay by bank transfer, the component displays the banking details needed for customers to complete payment.
- If a QR code is available for customers to complete payment on their mobile device, the component displays the QR code.
- If customer action is required to complete payment (e.g. by completing 3D Secure or iDEAL issuer authentication), the customer is redirected to the relevant page. If successful, the customer is then redirected to the
4. Go live
To test the payment method, use our Testing.
When you're ready to process real payments, make the following changes:
-
In Step 1: Add the HTML elements, replace the:
- Test JavaScript library with the live JavaScript library:
<script src="https://pay.multisafepay.com/sdk/components/v2/components.js"></script>- Test CSS file with the live CSS file:
<link rel="stylesheet" href="https://pay.multisafepay.com/sdk/components/v2/components.css"> -
In Step 2: Construct the component object, change the environment from
testtolive:PaymentComponent = new MultiSafepay({ env: 'live', apiToken: apiToken, order: orderData }); -
In Step 3: Create an order, change the test endpoint to the live endpoint:
https://api.multisafepay.com/v1/json/orders
Support
Email [email protected]
Updated about 10 hours ago